
-
Got Your Mac Plus 2026 Serial Number? Here’s How to Install It
QuickBooks Desktop comes in different versions to assume compatibility with various operating systems. QuickBooks for Mac is a specific version of QuickBooks which is compatible with Apple operating system. It is only specific to Mac and is not supported by Windows and other operating systems. This version of the accounting program was released to cater to the needs of an astonishing number of Apple users in small and medium businesses. Through this article, users shall get equipped with the different steps to Install and set up QuickBooks desktop for Mac. Keep reading ahead!
Walkthrough to Install QuickBooks Desktop for Mac
Users need to adhere to the below-given walkthrough in order to install a compatible version of QuickBooks for Mac on their systems.
Step 1: Check Minimum System Requirements
Before embarking on the installation process, it is a necessary prerequisite to check for the minimum system requirements needed for seamless functioning of QuickBooks Desktop for Mac.
- For QuickBooks for Mac 2016 R5 or earlier: Mac OS 10.10.2 (Yosemite), macOS 10.11 (El Capitan)
- For QuickBooks for Mac 2016 R6 and later: Mac OS 10.11 (El Capitan) and macOS 10.12 (Sierra)
- Intel processor, Core 2 Duo or higher
- Multi-User Server: Intel Core 2 Duo or higher
- RAM requirement: 2 GB RAM
- Disk space requirement: 250 MB of available disk space
- CD/DVD drive for software installation
- Printer: 100% Macintosh-compatible printer (if printing invoices, checks, etc.)
- Checks: Required to print checks
Step 2: Acquire the Product License and Serial Number
The user needs to ensure that he has all the important product related credentials, especially the license and the product keys available at his/her disposal. These credentials can be found in the confirmation email sent by Intuit, or the documentation acquired while purchasing QuickBooks Desktop for Mac.
Step 3: Download and Install QuickBooks Desktop for Mac
Upon checking the minimum system requirements and making sure that the system meets all the prerequisite requirements, user should perform the following procedures to download and install QuickBooks for Mac without any hassle.
- Start off by downloading QuickBooks for Mac version on the system.
- Follow up by starting the installation of the accounting program from the CD
- Make sure to start the installation as an admin. If the installer doesn’t start automatically, the user is required to double-click the installer file to initiate the process.
- The user also needs to close all the active applications running in the background.
- When the installation is successful, user can proceed by double-clicking the QuickBooks icon available in the Applications folder.
::::: Read More :::::
-
How to Fix "QuickBooks Error 404" Connection Failure
QuickBooks Error 404 occurs when users try to establish a connection with their bank through QuickBooks. There can be different causes for this error, and various troubleshooting methods can be performed to resolve it. In this article, we will outline the steps you can take to fix QuickBooks Error Code 404. Please follow the instructions provided below.
Common Signs of QuickBooks Error 404
- An elaborate dialog box appears, describing the error.
- User inputs that usually take minimal processing time now take a significant amount of time to process.
- The computer may shut down and restart abruptly.
Steps to Resolve QuickBooks Error Message 404
Here are some troubleshooting steps you can try to resolve QuickBooks Error 404:
Step 1: Configuring the Internet Settings
- Start off by opening the Internet Explorer from the Desktop or the Start menu.
- Follow up by accessing Settings from the gear icon.
- Proceed by hitting on Tools and after that, advance to the Security section.
- Now, head to the Internet tab.
- Go to the website and following that, hit on Add.
- Herein, the user is required to add Intuit URL and following that, hit on Accept.
Step 2: Checking the Internet Connection
- Start off by opening the Internet Explorer and following that, try to navigate to some random websites in order to check the internet connectivity.
- If the URLs load up successfully, then the internet connection is fine, otherwise, resort to restarting your router.
<<<Read More>>>
-
Improving Cash Flow with QuickBooks Mac Plus 2022 Tools

QuickBooks Mac Plus 2022 brings a range of new features designed to automate and streamline daily accounting tasks of small and medium sized businesses. Read this article till the end to discover what's included in this new QuickBooks Mac release. These new features will help business owners leverage the features to benefit their business and accentuate their profitability.
To stay updated on the latest features in QuickBooks Mac Plus 2022, I recommend visiting the official Intuit website or reaching out to their customer support for the most accurate and up-to-date information.A closer look at the different features in QuickBooks Mac Plus 2022
Receipt Management
Effortlessly scan or upload receipts and import data directly into QuickBooks from those receipts. You can then create new transactions using the receipt information or match it with existing transactions, making it easier to keep track of your expenses.Collapse Report Columns & Rows
Have greater control over your reports by collapsing and expanding columns and rows. Customize the display of information to focus on what matters most to you, allowing for a more tailored and insightful reporting experience.Automated Statement Reminders
Save time by scheduling customer statements, ensuring they are prepared for review before sending them out. This feature streamlines the process and helps you stay on top of your customer communication.Automate Customer Groups
Efficiently manage your customers by creating rules based on specific fields such as customer type, status, location, or balance. Once the rules are set, the customer groups automatically update based on your defined criteria. This allows you to segment and organize your customer base for targeted business management.Export Register to Excel
Simplify the viewing and analysis of your register by exporting it to Excel. This feature enables you to manipulate the data, flag important transactions, and add relevant notes, providing a more flexible and comprehensive overview of your financial records.
Read More...!!! -
QuickBooks Error 557: Why It Happens and How to Resolve It
Error 557 is a common error that occurs during the installation or update process of QuickBooks. This error is typically caused by insufficient hard disk space on the computer or damaged installation files. In this article, we will discuss the main causes of QuickBooks Error Code 557 and provide effective solutions to resolve it without requiring technical expertise.What does QuickBooks error 557 means?
This error is a relatively uncommon error that users may encounter while working with QuickBooks software. Unfortunately, as of my knowledge cutoff in September 2021, there is no specific information available regarding QuickBooks Error 557. QB errors can have various causes, ranging from software conflicts and outdated installations to data file issues and network problems.
You might get the following error message on your computer screen:

Causes of QuickBooks Error 557
The following are common causes that contribute to this update error in QuickBooks:- Incorrect installation of previous QuickBooks updates.
- Unexpected system shutdown during a previous QuickBooks installation.
- Malware or virus attacks that damage important QuickBooks files.
- Incorrect QuickBooks settings.
- Damaged entitlement file.
- Expired QuickBooks subscription.
Simple Solutions to Fix QuickBooks Error 557
Follow the solutions outlined below to resolve this update error permanently.Solution 1: Remove the Entitlement file
To remove the Entitlement file and reactivate QuickBooks, follow these steps:- Press the Windows + E keys together to open Windows File Explorer.
- Navigate to the "C:/ProgramData/Intuit/Entitlement Clientv8" folder.
- Right-click on the EntitlementDataStore.ecml file and choose "Delete."
- Launch QuickBooks and provide the necessary product registration information, including the license and product keys.
- Install QuickBooks Desktop updates and reinstall any payroll updates.
Solution 2: Perform System Restore
Use the System Restore feature to revert your system and QuickBooks to a previous state without QuickBooks Error 557.- Log in to your computer with the correct Administrator username and password.
- Go to System Tools in the Accessories menu and select "System Restore."
- Choose a recent restore point.
- Click "Next" and wait for the process to complete.
- Restart Windows and run QuickBooks again.
Solution 3: Scan the Computer for Viruses
Perform a full system scan to detect and remove any viruses that may be causing Error 557.
<<< Read More >>> -
QuickBooks Error Code 17337 – Causes & Easy Fixes
Many types of errors in QuickBooks trouble the user. Similarly, QuickBooks error 17337 is another payroll update interface error that causes trouble in updating the application. If you are also troubled by such an error, then this article is important for you, in this you will get complete information related to QuickBooks error 17337.
What is QuickBooks error 17337?
The most used feature in QuickBooks software is QuickBooks Payroll. This feature allows the user to handle state taxes and pay employees without any burden. However, many types of errors have to be faced in payroll, one of which is 17337. The error is caused by poor network connectivity, firewall restrictions, use of outdated software, corrupted payroll data, or incorrect SSL settings. Also, this error causes problems between QuickBooks desktop and Intuit server, causing the update process to fail.
Reasons by which the QuickBooks Error 17337 occur
Here is a list of some of the most common causes which trigger error 17337 during QuickBooks payroll update-
-
Your computer's anti-virus software might make it harder to update QuickBooks payroll.
-
A significant cause of QuickBooks Payroll Error 17337 is the SSL Settings in Internet Explorer.
-
QuickBooks error message 17337 may have arisen as a result of the Windows Firewall blocking the payroll update procedure.
-
Damaged files in the local directory may also trigger the error.
-
Internet Explorer properties may not be in sync with the QB payroll update requirements.
Solutions to fix the QuickBooks Error 17337
You can manually resolve QuickBooks payroll error 17337 by following these steps-
Solution 1- Repair QuickBooks Desktop (QBDT)
-
Click on window button and search control panel to open it.
-
After that click on “Programs and Features” than “Uninstall a Program.”
-
Find QuickBooks and click to open in the list of installed programs.
-
Follow the on-screen instructions by clicking "Repair" or "Change."
-
Restart your computer after the repair is complete.
Solution 2- Modify the SSL Settings for Internet Explorer within QuickBooks
-
Open QuickBooks desktop on your system.
-
Select the "Internet Connection Setup" option by pressing the Help button.
-
Now, select the appropriate internet connection and hit the Next button.
-
Select the option for Advanced Connection Settings.
-
Go to the window's Advanced section and scroll down to the options list.
-
Tick the following two boxes – SSL 2.0, SSL 3.0
-
After that, press OK to confirm by tapping the Apply button.
-
Final click on done.
-
Again launch the QuickBooks application and download the latest payroll updates.
Solution 3- Set up Internet Explorer’s SSL Settings
-
Open QuickBooks then go to the Help menu and click on Internet Connection Setup.
-
Select Internet Options from the available options by tapping the Tools tab.
-
Go to the Advanced tab in this window and move to the Security section.
-
Mark the SSL 2.0, SSL 3.0 from given the boxes.
-
Press Apply button and finally press OK.
Solution 4- Mention QuickBooks in the Exception list for Windows Firewall
-
First click on start menu to open it.
-
Go to the search bar to type Windows Firewall and click to open it.
-
Now click on the Advanced Settings option.
Read More…!!
-
-
How to Resolve QuickBooks Error Code 6123, 0?

QuickBooks accounting software is a very easy and comfortable application for businesses through which you can create and manage your accounting and financial reports. But like all software, QuickBooks also has many technical errors which cause a lot of trouble to the user. At the same time, work also gets interrupted. QuickBooks Error 6123, 0 is also one of these errors that the user faces when he is trying to restore the backup of the company file. However, this error appears suddenly without any indication, which interrupts the operation of the QuickBooks company file.
There are some factors and technical issues that cause QuickBooks Error 6123, 0. Which we will solve easily with the help of the steps mentioned in this segment.What is QuickBooks Error 6123, 0?
Whenever error 6123, 0 is active in your software, this error appears on the display of the QuickBooks desktop with a message that reads "Error: -1623, 0 we’re sorry, QuickBooks cannot open the company file." Typically, this QuickBooks error 6123, 0 TB occurs when users open their company file while trying to restore it after an upgrade. Additionally, this error does not occur in a network file. The reasons for this vary – it can be due to corrupted data within the file, network setup issues, firewall restrictions, or even a faulty QuickBooks installation. While tools like QuickBooks File Doctor often come in handy as a solution, sometimes the solution requires a more in-depth approach, which we will consider in detail.Causes for QuickBooks Error 6123, 0.
If you are encountering QuickBooks error code 6123, it is probably due to one of several common factors. Identifying the root cause is the first step to resolving the problem. Here is a description of the causes that trigger this error-- If you are trying to back up or restore data when the error occurs, this process may be the cause of QuickBooks error 6123, 0.
- This error often occurs when the company file is already open on another computer, especially in a multi-user setup.
- Problems related to your network or connection can disturb access to QuickBooks, which trigger the error 6123.
- Sometimes, other applications, especially antivirus programs, can interfere with QuickBooks, it can lead this error.
- Older version of QuickBooks also lead various errors including error 6132, 0.
- Incorrect permissions on the folder containing the company file can prevent proper access, causing this error.
- Corrupt network connection can announce the arrival of a 6123 QuickBooks error.
- QuickBooks error 6123 0 may appear if the Windows Operating System is crashed or gets damaged.
Solution to fix the QuickBooks error 6123, 0.
Solution 1- Run ‘Quick Fix my File’ in Tool Hub
- If you have QuickBooks tool hub then open it by double clicking on it. If you don’t have then download and install it.
- Select the Company file issues option from the tool hub.
- And click ‘Quick Fix my File’ button.
- It start scanning and repairing the files issues and it take few minutes. After completing the process exit from it.
Solution 2- Use the QuickBooks File Doctor
- You can use QuickBooks file doctor from the tool hub.
- Go to the company files issues tab and click on the QuickBooks File Doctor’ button.
- Follow the instruction which is shown on screen prompts.
- Select your company file and browse to locate it.
- Click to ‘Check your file’ and then click on continue.
- Enter your QuickBooks admin password when prompted, then click Next.
- File Doctor Start diagnosing and repairing any problems.
- After completing the process restart your computer and open the QuickBooks desktop and try to access company files.
-
Complete Guide to Fix QuickBooks Error 15276
Although QuickBooks is a reliable accounting program for small and medium-sized enterprises, mistakes can still happen with it. QuickBooks Error 15276, which usually arises during payroll updates, is one problem that users frequently encounter. Typically, the error message looks like this:Error 15276: The payroll update did not complete successfully. One of the files to be updated was in use and could not be replaced.
This guide provides practical fixes for Error 15276 so that your QuickBooks payroll can resume operating normally.
Solution To Fix QuickBooks Error 15276
Solution 1: Use Quick Fix My Program (QuickBooks Tool Hub)
· Download the QuickBooks Tool Hub from the official Intuit site.
· Install it by following on-screen instructions.
· Open the tool and navigate to Program Problems > Quick Fix My Program.
· Wait for the scan to complete.
· Reopen QuickBooks and try updating again.
Solution 2: Update QuickBooks Desktop and Tax Table
· Close all company files.
· Right-click the QuickBooks icon > Run as administrator.
· Go to Help > Update QuickBooks Desktop.
· Select Update Now and click Get Updates.
· After the update, restart QuickBooks.
· Go to Employees > Get Payroll Updates.
· Check Download Entire Update and click Download Latest Update.
Solution 3: Reinstall QuickBooks Desktop
· Uninstall QuickBooks
· Open Control Panel > Programs and Features.
· Select QuickBooks > Uninstall/Change.
· Follow on-screen instructions.
-
How To Fix Company File Not Found in QuickBooks Desktop?
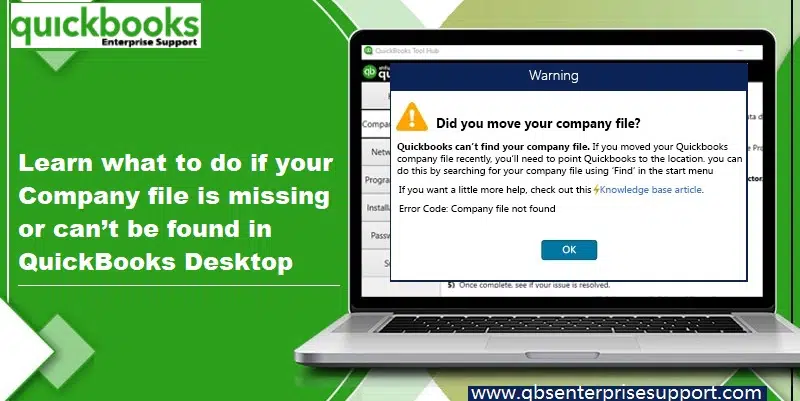
If you’re seeing the critical “Company File is Missing or Cannot Be Found” error in QuickBooks, don’t panic. This is a common issue—usually related to file path misplacement, incorrect setup, or a damaged file. In this guide, we’ll explore the key causes and walk you through the most effective solutions to resolve this error and get your QuickBooks company file working again.
Common Reasons Behind the Error
Understanding why the error appears is crucial before jumping to solutions. Below are the most The company file has been moved, deleted, or renamed.- The file location is on a disconnected external or network drive.
- Incorrect file extension or file name corruption.
- The QuickBooks Database Server Manager isn’t running.
- Network connectivity issues in multi-user setups.
- File permissions are restricted on the host system.
- Search for the Company File Manually
- Open File Explorer.
- Search for files ending with .QBW (QuickBooks company file extension).
- Once found, note the file path and open it in QuickBooks.
QuickBooks Tool Hub comes with the File Doctor, which detects and repairs common file issues. Follow the steps below:- Download and install the QuickBooks Tool Hub
- Launch it and go to Company File Issues tab.
- Click on Run QuickBooks File Doctor.
- Browse and select your company file.
- Let the tool diagnose and fix the problem.
If the file was stored on a network or external drive, ensure it’s still connected. Then- Reconnect the drive or server.
- Navigate to the correct folder where the .QBW file is stored.
- Open QuickBooks and choose Open or Restore an existing company.
- Ensure your company file uses the .QBW extension.
- Make sure the folder containing the file has proper read/write permissions.
- Right-click the folder > Properties > Security tab > check your user account has Full Control.
- Go to File > Utilities in QuickBooks.
- On the host computer, ensure Host Multi-User Access is enabled.
- On workstations, Stop Hosting Multi-User Access should be selected.

You’re offline. This is a read only version of the page.
